Think Before You Type

It’s been a while. And by ‘while,’ I mean…well. Who’s counting?! I have several goals for the new year including getting back in to nail art and blogging!

The main thing keeping me busy has been my polish line, and today’s post is a short lesson in decorum. This won’t be everyone’s cup of tea, but it is important to me.

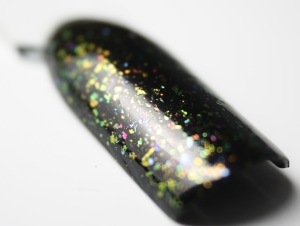
My business – Wicked Polish – has an Instagram account all its own (@WickedPolish). The following was posted on a photo of my two newest polishes, a duo of duo chrome flakes called Fook Mi and Fook Yu.Fook Mi 4
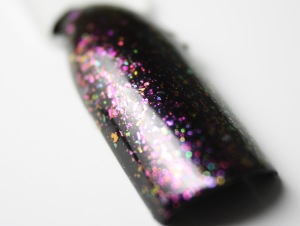
 

Upon swatching these beauties the first time, I sent a picture to my friends, one of whom exclaimed, “Fook me, those are gorgeous!” Ever the appropriate gentle women (hah!), we decided the pair should be named after the twins in Austin Powers (rather than F*** Me and F*** You. You’re welcome, parents of children!).

Fook Yu 4

The duo sold out quickly (don’t worry, they’ll be back!) before Christmas. They were popular and when people get to use them, I’m sure they’ll love them even more. One customer even sent me a funny short story about her holidays and the polishes she bought.

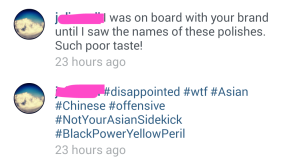
This weekend, though, I woke up to the following comment on Instagram:

2014-12-28 18.43.02

Sadness in my heart. I deleted the comments (s/he abruptly began yelling at me) and DM’ed the poster because I feel that sort of conversaction isn’t something that’s appropriate for my business site. Now, this blog post isn’t about whether I’m racist or not (spoiler alert: I’m not). It isn’t about whether you think these names were or are racist (if you think they are, please read to the end before we talk about it). This post is about how to appropriately broach a serious topic.

Had this poster been willing to engage in a respectful conversation with me, I would have heard them out. I am embarrassed to think that people might believe anything about me or what I stand for is racist…it simply isn’t the case. Had they not thrown hash tags accusing me of racism, referencing real or perceived acts of law enforcement violence against people of color, I would have been more likely to listen to their perspective. Instead I recommended they watch Austin Powers and rethink the lens through which they perceive the world. I can’t change the poster’s mind about me, but it would have been nice to have a teeny bit of respect to start the conversation off with.

If you have a legitimate point to make, if you want to convey your opinion or thoughts on social media to random strangers whom you know NOTHING about, start with some respect and decency. I guarantee it will get you farther.

rylee

3D Stamping

*some products provided for review*

Howdy you guys…

Thank you all for following my blog! It’s been a long time and for that I’m sorry.  Between my job, my house, and Wicked Polish, I’ve let things slip.

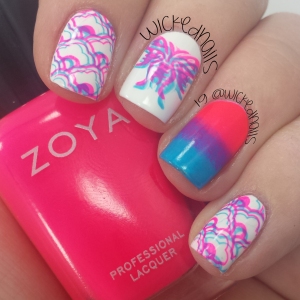
I wanted to come back tonight to show you this fun stamp I did using Born Pretty Store’s stamp W-03, Pueen 15, a wedge makeup sponge (also from Born Pretty Store),  Zoya Ali and China Glaze Sunday Funday.

BornPrettyStampPueenGradient2


How fun is that, right? Looks like 3D!! Mr. WickedNails was like, WHAAA????

The secret to stamping is in the stamper. Mine I bought from MoYou London and I adore it. They have 3 and I own them all. The double ended one is my fave!

❤ ya! Rylee

Eyes On Indie

Hi all!

Sorry for my absence, but we bought a new house and moved! Yay!

My nails suffered a bit, so while they recover from moving boxes and Tempurpedic mattresses (don’t. just don’t), here is some exciting news about your favorite local Indie brands!

EyesOnIndie


Katherine of Polished by KPT began arranging this months ago with a local handcrafted, sustainable, DIY boutique called Ecomonster.

I will be there with lots of fun Wicked Polish goodies, and other indies will be there as well! Tickets are limited and are only $5, on sale at the above linked site.

It should be LOTS of fun, and if I swing things the right way, I may bring my pink glitter table.  Who knows 🙂

xoxo Rylee

Nail Art! (The Lost Designs)

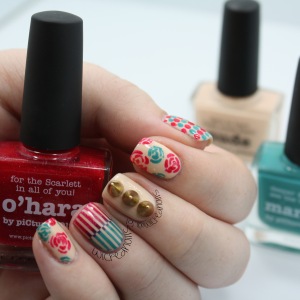
I did a few (haha, understatement!) other designs with my piCture pOlish shades, trying to find something that was me, while attempting the “Best Nail Art You’ve Ever Done” (pressure, much?)

WickedNails.wordpress.com IG @wickednails

WickedNails.wordpress.com
IG @wickednails

If you haven’t already, please head over and vote for your favorite mani on the piCture pOlish Pinterest board! I would love to win the prize, a collaboration shade between PP and yours truly!

TLD2

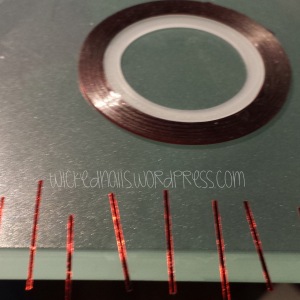
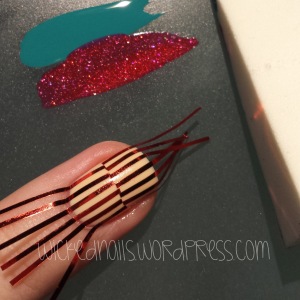
I began by cutting off tons of striping tape into small strips about one inch long.  I painted by nail nude and allowed it to completely dry.

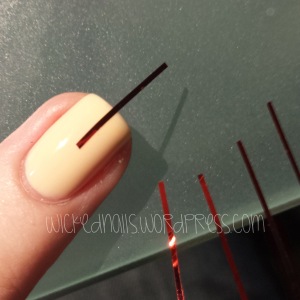
TLD3Began in the middle of my nail, applying the bottom (top?!) of the tape halfway down my nail bed.

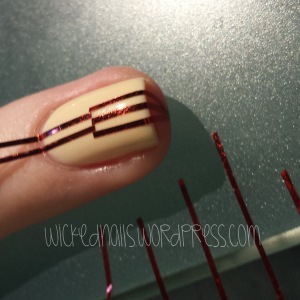
TLD4Then I applied the rest of the strips as shown, trying to get their tops and bottoms lined up just next to each other so I wouldn’t be left with a horizontal line of nude across my nail.

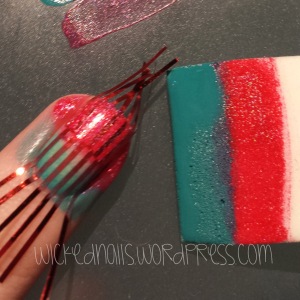
TLD5Some people apply the polish directly to their makeup wedge sponge (cosmetic wedges, I get mine at the drugstore), some people prefer to blend the polish on a surface first and dab the sponge onto it.

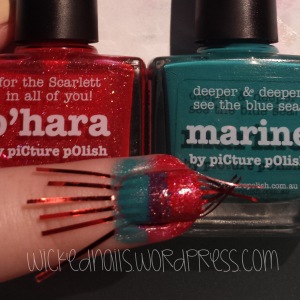
TLD6At first, you won’t have full coverage from the sponge, but allow a few seconds of dry time, and sponge again, and again.  Be sure to keep your center line, where the two colors meet, right about in the middle.  I wanted my polish to blend together around the middle of my nail bed, so i blended up and down just a bit.

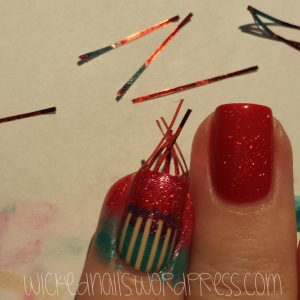
TLD7Tada!  Lots of polish all over the place 🙂  Now, the big reveal!

TLD8Pull the tape off, one piece at a time, IMMEDIATELY after you finish sponging your color on…pulling the tape off while the polish is still very wet is key to getting clean lines!

WickedNails.wordpress.com IG @wickednails

WickedNails.wordpress.com
IG @wickednails

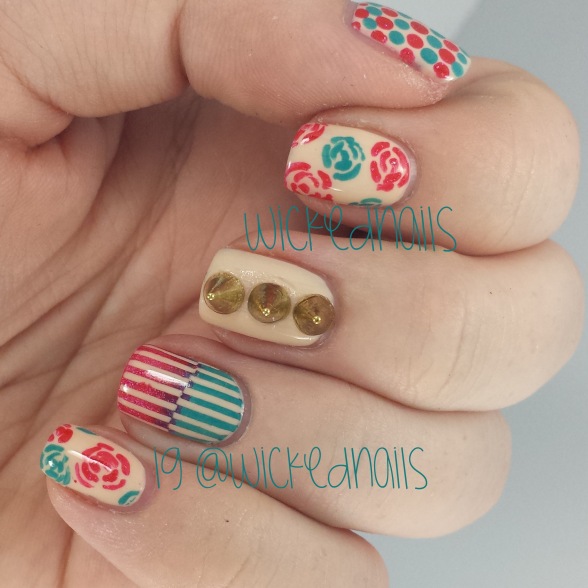
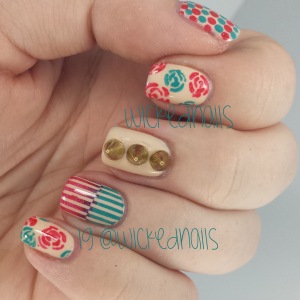
I used a teeny brush to create the flowers by staggering small ‘C’ shaped curves from the inside of each flower out.  The spiked studs are the same ones I used here yesterday.  I used a dotting tool from eBay for the dots on my thumb.  Obviously, wait a bit before using a thick topcoat so you don’t drag your beautiful nail art around!

❤ Rylee

Picture Polish BlogFest 2013: Wicked Spikes and Tutorial!

WickedNails.wordpress.com IG @wickednails

WickedNails.wordpress.com
IG @wickednails

First things first: if you haven’t heard of piCture pOlish, click HERE to check them out.  These wondrous Aussie polishes have adorable names, slogans, and are in cute bottles. Go, buy!

Vote by checking out the Pinterest board at http://pinterest.com/picturepolish/picture-polish-launch-board/

And then enter your vote HERE: https://www.picturepolish.com.au/index.php?route=information/information&information_id=10

WickedNails.wordpress.com IG @wickednails

WickedNails.wordpress.com
IG @wickednails

I am so pleased to have the honor of participating in this year’s piCture pOlish BlogFest! The theme is “Year of the Blogger.” This 24 hour nail art extravaganza takes place on the interwebs with bloggers all over the world – and best of all, there are prizes to be won!

One award will be chosen, through likes on the Pinterest board linked above, by YOU!!! One award will be chosen through votes by participants, and one will be given out by the two lovely ladies of piCture pOlish, Jules and Megs!

Winners get to collaborate on shades of polish with PP! How cool would that be! I’m drooling just thinking about it!

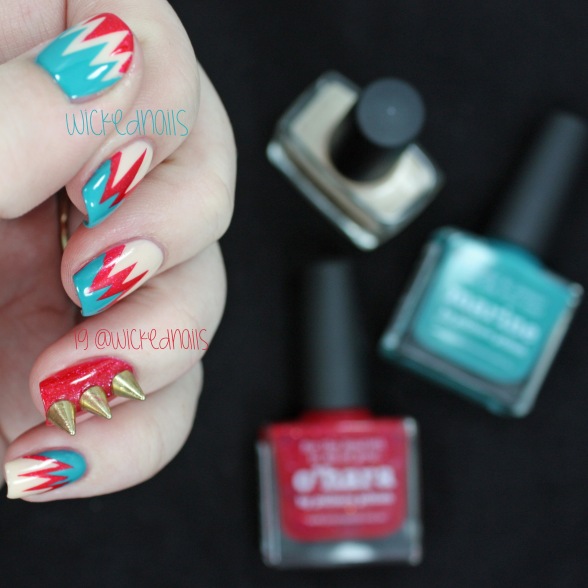
I was sent three colors by piCture pOlish to play around with, create a manicure, and bring you a step by step tutorial.

WickedNails.wordpress.com IG @wickednails

WickedNails.wordpress.com
IG @wickednails

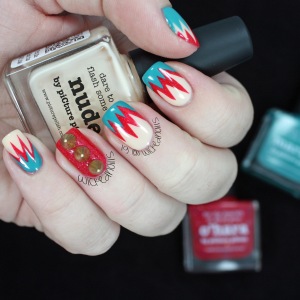
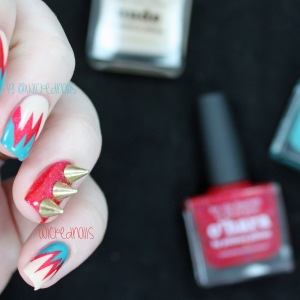
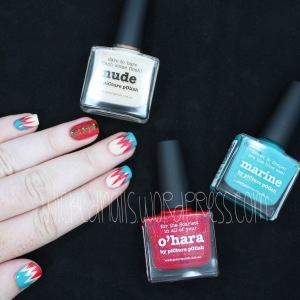
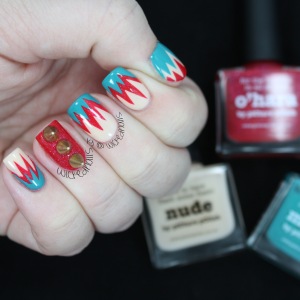
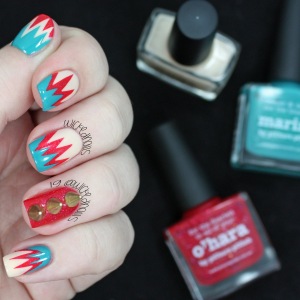
My shades were o’hara – for the Scarlett in all of you! marine – deeper & deeper see the blue sea, and nude – dare to bare flash some flesh.  Oh, what fun I had playing with these! I will probably show you some other nail art using them in the days to come…

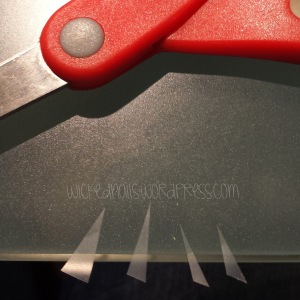
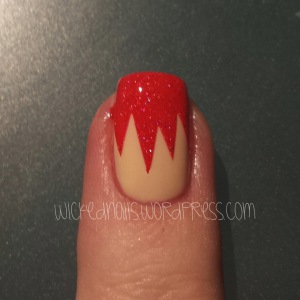
1I began by painting my nails with Nude and allowing them to COMPLETELY dry.  I cut triangles out of plain old Scotch tape as shown above…

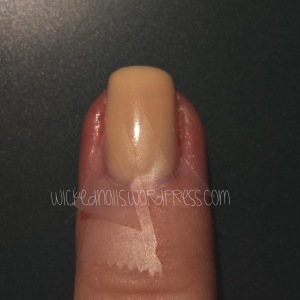
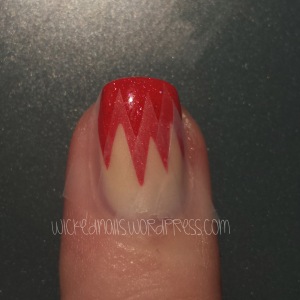
2…and stuck them on my nail to form wicked spikes! Although I’ve seen something similar done by Nailside, this was my first attempt!

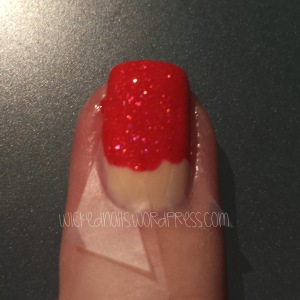
3I painted my tips using O’Hara, making sure the tape was snug before painting all the exposed nail.

4I peeled the tape off RIGHT AWAY (this is the key to getting clean lines, don’t wait for the polish to dry!) and voila!

5After waiting for that polish to dry (you don’t want to peel the polish off with the next layer of tape!), I applied triangles of tape again, this time overlapping the spikes as shown above.  Keeping the lines even is the hardest part of this!  I painted that section with Marine and peeled the tape off right away again.

92

WickedNails.wordpress.com
IG @wickednails

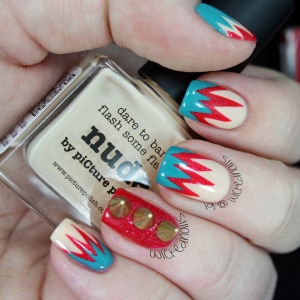
Squee! I love the way these turned out.  My accent nail is simply one (YES ONE!) coat of O’Hara with topcoat and three nail art spikes glued on.  The spikes are from Selena of PinkURock.com!

WickedNails.wordpress.com IG @wickednails

WickedNails.wordpress.com
IG @wickednails

I used 3 thin, easy coats of Nude to reach full, even coverage on my nails, but both O’Hara and Marine were easy one-coaters!

WickedNails.wordpress.com IG @wickednails

WickedNails.wordpress.com
IG @wickednails

I used the same technique on my thumb, but spaced the spikes out to create…teeth?  An EKG reading?  Who knows!

WickedNails.wordpress.com IG @wickednails

WickedNails.wordpress.com
IG @wickednails

A HUGE thank you to piCture pOlish for selecting me to participate in this contest and receive these lovely colors to try out and create with!  Please let me know if you try this technique, there are so many things you can do with it!  And if you ever want to be able to own a truly WICKED shade of piCture pOlish, I will need your help!  Head over and vote!

http://pinterest.com/picturepolish/picture-polish-launch-board/

❤ Rylee

piCture pOlish where to buy: Click HERE for international shipping, or Click HERE for their network of distributors!

piCture pOlish Facebook: Click HERE!

piCture pOlish Instagram: Click HERE!

piCture pOlish Twitter: Click HERE!

piCture pOlish YouTube: Click HERE!

piCture pOlish Pinterest: Click HERE!